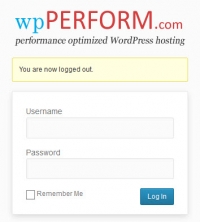
When you visit the login page of a WordPress powered site, you’ll see prompts for a username and password. Above those prompts is a WordPress login logo. On wpPERFORM.com, we’ve changed that login logo to our own image, but it’s easy for you to have a custom login logo for your site. We also support a custom dashboard logo, which you’ll see on the left corner of the toolbar in your dashboard. You can customize one or both of these logos using the steps outlined below. You can read more about customizing the WordPress login form in the WordPress codex. We’ve reduced the steps outlined in the codex to a plugin, so the information at that link is for background only.
Create and Upload Your Images
Using your favorite image editing software, you’ll need to create the logos you want to customize.
Your login logo should be a transparent PNG file with a width of exactly 312 pixels. For reference, our login logo is 312 pixels wide by 69 pixels high. You should include any padding pixels in the image itself, because the image will be displayed with minimal styling. If the content of your image does not fill the width completely, position the content within the image according to your taste. That is, if your content is narrow than 312 pixels and you want it centered, it’s up to you to center the content within the total image width.
Your admin dashboard logo should be a transparent PNG file with dimensions of exactly 20 pixels wide by 20 pixels high. It should have a background color of #464646.
Upload the files you created to your site. You can use the built-in WordPress Media Library or an image management plugin such as NextGen Gallery. To upload images using the Media Library, visit Media->Add New from your site’s dashboard and drag the images from your computer to your browser.
Once your images are uploaded, you may find it handy to keep your dashboard open to the Media Library and open a new tab to where we’ll head next, Plugins.
Activate Our wpPERFORM.com Login Logo Plugin
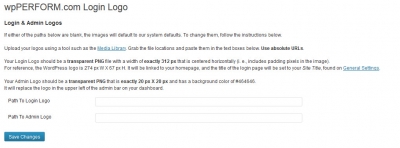
In your new tab open to the Plugins menu, find our wpPERFORM.com Login Logo plugin in the plugins list and activate it. Once active, the settings for the plugin appear on the Settings->wpPERFORM.com Login Logo menu. In addition to setting logos, our plugin sets the title attribute of your login page to the Site Title found on your Settings->General page and links the login logo to your site’s home page.
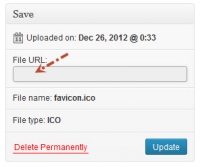
In each text box, you’ll record the file location of the relevant image. To do that, select the Media Library tab you left open in the previous step, and one by one, grab the file location (the File URL), copy it, switch to the browser tab with the login logo plugin settings, and paste it into the appropriate text box. To get the File URL, open each image by clicking the Edit link below the image in the list of images in your media library. The screenshot below shows the File URL in a 2 column screen display. Click in the File URL text box, select the entire file location, and copy it. With the file location copied into your paste buffer, switch to the browser tab with the login logo plugin settings and paste the location into the appropriate text box. Repeat these steps for each of the logo images you’d like to use.
When you’ve pasted all of your file locations, click the Save Changes button.
Check Your Logos
To see the results of your work, you’ll first need to log out. Your new login logo should be displayed when you attempt to log in. Once you successfully log in, your admin dashboard logo will be displayed in the upper left corner of your WordPress toolbar.


